

Imagine the satisfying crunch of deeply rich chocolate cookies giving way to a refreshing, tangy cream cheese center, all without the terrifying prospect of a cracked water bath or a sunken crust. If baking gives you performance anxiety, fear not—this recipe is your effortless ticket to dessert heroism.
These delightful morsels—theHealthy No-Bake Oreo Cheesecake Bites – Easy Spring Festival Dessert Recipe—are the ultimate solution for chaotic kitchen endeavors, offering a decadent, portion-controlled treat perfect for any sophisticated celebration.
- Effortlessly achievable dessert requiring zero baking skills, making it perfect for novice kitchen adventurers and busy hosts alike.
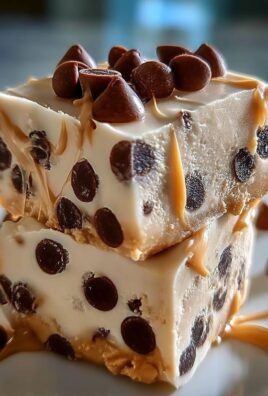
- A decadent flavor combination featuring rich chocolate cookies perfectly balanced by a refreshingly light and tangy cream cheese filling.
- Visually stunning, bite-sized portions that are easily customizable with various toppings and vibrant colors ideal for seasonal celebrations.
- Incredibly versatile, these treats travel well and are excellent for impromptu gatherings or as elegant gifts during the Spring Festival.
The Anatomy of a Perfect No-Bake Treat
I know what you are thinking: “Healthy” and “Oreo Cheesecake” usually do not share the same zip code, let alone the same recipe title. But trust me on this one. The beauty of this recipe lies not in revolutionary ingredient swaps, but in portion control and strategic preparation. We are taking a classic, beloved flavor profile and transforming it into elegant, bite-sized truffles, which automatically makes them easier to manage—unless you eat 40 of them, which, no judgment, but defeats the purpose.
When the Spring Festival rolls around, sometimes the last thing you want to do after preparing a massive holiday meal is babysit an oven. You need a dessert that looks like it took you days of meticulous effort but actually required only about twenty minutes of focused mixing and a trip to the refrigerator. These no-bake cheesecake truffles are the answer. They satisfy that deep, creamy craving while remaining light enough to enjoy after a substantial feast. Plus, the sheer joy of crushing those cookies is therapeutic, a crucial step in any successful holiday preparation.
The Secret to the “Healthy” No-Bake Approach
The term “healthy” here is subjective, but it revolves around efficiency and choice. We cut down on added sugars by letting the sweetness of the chocolate sandwich cookies do most of the heavy lifting. Furthermore, because these are small, individually rolled bites, they offer natural portion control. You can enjoy a rich, satisfying dessert experience without committing to an entire slice of traditional cheesecake that may leave you regretting your life choices later.
For those aiming for maximum lightness, you can opt for reduced-fat cream cheese or a plant-based cream cheese alternative. Just ensure that whatever you choose is brick-style and fully softened to guarantee that velvety texture. The consistency of the base is paramount; if it is too runny, you will end up with creamy cookie sludge rather than rollable truffles.
Ingredients for Healthy No-Bake Oreo Cheesecake Bites – Easy Spring Festival Dessert Recipe
Here’s what you’ll need to make this delicious dish:
- Chocolate Sandwich CookiesApproximately one standard package. These form the base and the structure, providing the necessary chocolate flavor and grit.
- Full-Fat Cream CheeseMust be completely softened to room temperature. This provides the essential creamy tang and binding agent for the filling.
- Granulated Sugar or Alternative SweetenerJust a touch is needed to enhance the cream cheese flavor, ensuring the mixture is perfectly balanced against the cookie crumbs.
- Alcohol-Free Vanilla ExtractUse pure alcohol-free vanilla extract to deepen the overall flavor profile of the cheesecake filling.
- Unsalted ButterMelted and slightly cooled. This helps bind the crust mixture before chilling, ensuring the bites hold their shape.
- Optional CoatingsPowdered sugar, cocoa powder, melted white chocolate, or colored sprinkles appropriate for the Spring Festival, used for decoration and texture variation.
The full ingredients list, including measurements, is provided in the recipe card directly below.
How to Make Healthy No-Bake Oreo Cheesecake Bites – Easy Spring Festival Dessert Recipe
Follow these simple steps to prepare this delicious dish:
Step 1: Crushing the Cookie Base
You need approximately 30 chocolate sandwich cookies. Divide them into two portions. Place about three-quarters of the cookies into a food processor and pulse until they become fine crumbs—the texture should resemble wet sand. Set aside two tablespoons of these fine crumbs for later use in coating. Crush the remaining cookies more coarsely; these will be folded into the cream cheese filling for extra texture and visual appeal.
Step 2: Preparing the Cheesecake Filling
In a large mixing bowl, beat the softened cream cheese with a hand mixer until it is smooth and completely lump-free. Add the granulated sugar, melted butter, and alcohol-free vanilla extract. Continue mixing until the mixture is light and fluffy, scraping down the sides of the bowl frequently to ensure everything is thoroughly incorporated. This should take about two to three minutes.
Step 3: Integrating the Textures
Gently fold the coarsely crushed cookie pieces into the cream cheese mixture using a spatula. Be careful not to overmix at this stage; you want to distribute the chunks evenly without turning the entire filling gray. The goal is distinct white cream cheese dotted with dark chocolate pieces. If your filling seems slightly too soft, it is better to pop it in the freezer for ten minutes now than risk sticky rolling later.
Step 4: Chilling for Firmness
Cover the bowl tightly with plastic wrap and refrigerate the mixture for at least two hours. For the best rolling experience, four hours or even overnight is highly recommended. The firmer the mixture, the easier it will be to roll into perfect spheres without sticking to your hands or losing shape. If you are in a rush, a quick 45-minute blast in the freezer works wonders, but keep an eye on it to prevent freezing solid.
Step 5: Rolling the Bites
Line a baking sheet with parchment paper. Scoop the chilled mixture using a small cookie scoop or a measuring tablespoon (about 1.5 tablespoons per bite). Roll the portion tightly between your palms to form smooth, uniform spheres. If the mixture starts to soften while you are rolling, place the remaining mixture back into the refrigerator for a brief cool-down period.
Step 6: Coating and Final Chill
Roll each cheesecake bite in the reserved fine cookie crumbs or your chosen coating (powdered sugar, cocoa, or melted chocolate). Place the finished, coated bites back on the parchment-lined tray. Return the tray to the refrigerator for a final 30 minutes to firm up the exterior coating. This ensures they are perfectly set and ready to serve.
Transfer to an elegant serving platter and garnish with a dusting of extra cocoa powder or decorative sprinkles for the perfect finishing touch.
Customizing Your Spring Festival Dessert Truffles
The best part about these easy no-bake cheesecake truffles is their incredible versatility. While the core recipe is stellar, the toppings and presentation are what truly allow them to shine during the Spring Festival. Think beyond the basic cookie crumb coating; this is your chance to infuse seasonal cheer and vibrant colors into your dessert spread.
Elevating the Presentation with Toppings
Instead of just crushed Oreos, consider using contrasting colors to make the bites pop. Rolling the truffles in melted white chocolate mixed with a few drops of red or gold food coloring creates a stunning, celebratory shell. Alternatively, a quick dip in dark chocolate followed by a sprinkle of finely chopped pistachios or toasted coconut flakes offers a textural contrast and sophisticated look. If you prefer simplicity, a dusting of matcha powder provides an unexpected earthy bitterness that balances the sweetness beautifully, and its green color is subtly symbolic of new beginnings.
For a truly elegant presentation, place the finished cheesecake bites into miniature cupcake liners before serving. This not only makes them easier to handle but also elevates them from simple truffles to sophisticated petit fours. Remember, the Spring Festival is about abundance and beauty, and these little desserts should reflect that festive spirit.
Troubleshooting and Storage Tips
Even though this recipe is incredibly straightforward, a few common pitfalls can trip up even the most seasoned no-bake dessert enthusiast. The two most frequent issues are a mixture that is too sticky to roll and bites that lose shape too quickly once served.
Addressing a Sticky Filling
If you find the cream cheese mixture is too soft or sticky after the initial chill, there are two primary culprits: either your cream cheese was too warm when mixed, or you were too generous with the butter or cream. To fix this, simply add a few more tablespoons of finely crushed cookie crumbs (the dry, processed kind) into the mixture. The crumbs will act as a binder and absorb excess moisture, helping the mixture firm up. If adding crumbs is not an option, return the entire bowl to the freezer for 15-20 minutes. Cold is your best friend when rolling these perfect little spheres.
Storing and Making Ahead
One of the major advantages of theHealthy No-Bake Oreo Cheesecake Bites – Easy Spring Festival Dessert Recipeis their impressive shelf life and make-ahead potential. You can prepare the mixture, roll the bites, and coat them up to three days in advance. Store them in an airtight container in the refrigerator. Layer them carefully between sheets of parchment paper to prevent the coating from sticking or rubbing off.
For longer storage, these bites freeze beautifully. Place the finished, coated truffles on a baking sheet and freeze them solid for about an hour. Once frozen, transfer them to a freezer-safe bag or container. They will last for up to two months. Simply pull them out of the freezer about 30 minutes before serving to let them thaw slightly. They are often even better when served slightly chilled, providing a refreshing snap that is highly appreciated after a warm holiday meal.
Why Chilling is Non-Negotiable
Do not underestimate the power of chilling. This is a “no-bake” recipe, but it is not a “no-wait” recipe. The minimum two hours of refrigeration is crucial because it allows the fat molecules in the cream cheese and butter to solidify, transforming the mixture from a soft, sticky dough into a firm, manageable consistency. If you skip or shorten this step, you will end up with messy, misshapen blobs that require continuous wiping of your hands, which is far less enjoyable than a quick, clean rolling process.
By following these steps and incorporating some simple decorative touches, you will create a show-stopping dessert that proves elegance does not always require an oven or hours of grueling effort. Enjoy the compliments!
Imagine the satisfying crunch of deeply rich chocolate cookies giving way to a refreshing, tangy cream cheese center, all without the terrifying prospect of a cracked water bath or a sunken crust. If baking gives you performance anxiety, fear not—this recipe is your effortless ticket to dessert heroism.
These delightful morsels—theHealthy No-Bake Oreo Cheesecake Bites – Easy Spring Festival Dessert Recipe—are the ultimate solution for chaotic kitchen endeavors, offering a decadent, portion-controlled treat perfect for any sophisticated celebration.
- Effortlessly achievable dessert requiring zero baking skills, making it perfect for novice kitchen adventurers and busy hosts alike.
- A decadent flavor combination featuring rich chocolate cookies perfectly balanced by a refreshingly light and tangy cream cheese filling.
- Visually stunning, bite-sized portions that are easily customizable with various toppings and vibrant colors ideal for seasonal celebrations.
- Incredibly versatile, these treats travel well and are excellent for impromptu gatherings or as elegant gifts during the Spring Festival.
The Anatomy of a Perfect No-Bake Treat
I know what you are thinking: “Healthy” and “Oreo Cheesecake” usually do not share the same zip code, let alone the same recipe title. But trust me on this one. The beauty of this recipe lies not in revolutionary ingredient swaps, but in portion control and strategic preparation. We are taking a classic, beloved flavor profile and transforming it into elegant, bite-sized truffles, which automatically makes them easier to manage—unless you eat 40 of them, which, no judgment, but defeats the purpose.
When the Spring Festival rolls around, sometimes the last thing you want to do after preparing a massive holiday meal is babysit an oven. You need a dessert that looks like it took you days of meticulous effort but actually required only about twenty minutes of focused mixing and a trip to the refrigerator. These no-bake cheesecake truffles are the answer. They satisfy that deep, creamy craving while remaining light enough to enjoy after a substantial feast. Plus, the sheer joy of crushing those cookies is therapeutic, a crucial step in any successful holiday preparation.
The Secret to the “Healthy” No-Bake Approach
The term “healthy” here is subjective, but it revolves around efficiency and choice. We cut down on added sugars by letting the sweetness of the chocolate sandwich cookies do most of the heavy lifting. Furthermore, because these are small, individually rolled bites, they offer natural portion control. You can enjoy a rich, satisfying dessert experience without committing to an entire slice of traditional cheesecake that may leave you regretting your life choices later.
For those aiming for maximum lightness, you can opt for reduced-fat cream cheese or a plant-based cream cheese alternative. Just ensure that whatever you choose is brick-style and fully softened to guarantee that velvety texture. The consistency of the base is paramount; if it is too runny, you will end up with creamy cookie sludge rather than rollable truffles.
Ingredients for Healthy No-Bake Oreo Cheesecake Bites – Easy Spring Festival Dessert Recipe
Here’s what you’ll need to make this delicious dish:
- Chocolate Sandwich CookiesApproximately one standard package. These form the base and the structure, providing the necessary chocolate flavor and grit.
- Full-Fat Cream CheeseMust be completely softened to room temperature. This provides the essential creamy tang and binding agent for the filling.
- Granulated Sugar or Alternative SweetenerJust a touch is needed to enhance the cream cheese flavor, ensuring the mixture is perfectly balanced against the cookie crumbs.
- Alcohol-Free Vanilla ExtractUse pure alcohol-free vanilla extract to deepen the overall flavor profile of the cheesecake filling.
- Unsalted ButterMelted and slightly cooled. This helps bind the crust mixture before chilling, ensuring the bites hold their shape.
- Optional CoatingsPowdered sugar, cocoa powder, melted white chocolate, or colored sprinkles appropriate for the Spring Festival, used for decoration and texture variation.
The full ingredients list, including measurements, is provided in the recipe card directly below.
How to Make Healthy No-Bake Oreo Cheesecake Bites – Easy Spring Festival Dessert Recipe
Follow these simple steps to prepare this delicious dish:
Step 1: Crushing the Cookie Base
You need approximately 30 chocolate sandwich cookies. Divide them into two portions. Place about three-quarters of the cookies into a food processor and pulse until they become fine crumbs—the texture should resemble wet sand. Set aside two tablespoons of these fine crumbs for later use in coating. Crush the remaining cookies more coarsely; these will be folded into the cream cheese filling for extra texture and visual appeal.
Step 2: Preparing the Cheesecake Filling
In a large mixing bowl, beat the softened cream cheese with a hand mixer until it is smooth and completely lump-free. Add the granulated sugar, melted butter, and alcohol-free vanilla extract. Continue mixing until the mixture is light and fluffy, scraping down the sides of the bowl frequently to ensure everything is thoroughly incorporated. This should take about two to three minutes.
Step 3: Integrating the Textures
Gently fold the coarsely crushed cookie pieces into the cream cheese mixture using a spatula. Be careful not to overmix at this stage; you want to distribute the chunks evenly without turning the entire filling gray. The goal is distinct white cream cheese dotted with dark chocolate pieces. If your filling seems slightly too soft, it is better to pop it in the freezer for ten minutes now than risk sticky rolling later.
Step 4: Chilling for Firmness
Cover the bowl tightly with plastic wrap and refrigerate the mixture for at least two hours. For the best rolling experience, four hours or even overnight is highly recommended. The firmer the mixture, the easier it will be to roll into perfect spheres without sticking to your hands or losing shape. If you are in a rush, a quick 45-minute blast in the freezer works wonders, but keep an eye on it to prevent freezing solid.
Step 5: Rolling the Bites
Line a baking sheet with parchment paper. Scoop the chilled mixture using a small cookie scoop or a measuring tablespoon (about 1.5 tablespoons per bite). Roll the portion tightly between your palms to form smooth, uniform spheres. If the mixture starts to soften while you are rolling, place the remaining mixture back into the refrigerator for a brief cool-down period.
Step 6: Coating and Final Chill
Roll each cheesecake bite in the reserved fine cookie crumbs or your chosen coating (powdered sugar, cocoa, or melted chocolate). Place the finished, coated bites back on the parchment-lined tray. Return the tray to the refrigerator for a final 30 minutes to firm up the exterior coating. This ensures they are perfectly set and ready to serve.
Transfer to an elegant serving platter and garnish with a dusting of extra cocoa powder or decorative sprinkles for the perfect finishing touch.
Customizing Your Spring Festival Dessert Truffles
The best part about these easy no-bake cheesecake truffles is their incredible versatility. While the core recipe is stellar, the toppings and presentation are what truly allow them to shine during the Spring Festival. Think beyond the basic cookie crumb coating; this is your chance to infuse seasonal cheer and vibrant colors into your dessert spread.
Elevating the Presentation with Toppings
Instead of just crushed Oreos, consider using contrasting colors to make the bites pop. Rolling the truffles in melted white chocolate mixed with a few drops of red or gold food coloring creates a stunning, celebratory shell. Alternatively, a quick dip in dark chocolate followed by a sprinkle of finely chopped pistachios or toasted coconut flakes offers a textural contrast and sophisticated look. If you prefer simplicity, a dusting of matcha powder provides an unexpected earthy bitterness that balances the sweetness beautifully, and its green color is subtly symbolic of new beginnings.
For a truly elegant presentation, place the finished cheesecake bites into miniature cupcake liners before serving. This not only makes them easier to handle but also elevates them from simple truffles to sophisticated petit fours. Remember, the Spring Festival is about abundance and beauty, and these little desserts should reflect that festive spirit.
Troubleshooting and Storage Tips
Even though this recipe is incredibly straightforward, a few common pitfalls can trip up even the most seasoned no-bake dessert enthusiast. The two most frequent issues are a mixture that is too sticky to roll and bites that lose shape too quickly once served.
Addressing a Sticky Filling
If you find the cream cheese mixture is too soft or sticky after the initial chill, there are two primary culprits: either your cream cheese was too warm when mixed, or you were too generous with the butter or cream. To fix this, simply add a few more tablespoons of finely crushed cookie crumbs (the dry, processed kind) into the mixture. The crumbs will act as a binder and absorb excess moisture, helping the mixture firm up. If adding crumbs is not an option, return the entire bowl to the freezer for 15-20 minutes. Cold is your best friend when rolling these perfect little spheres.
Storing and Making Ahead
One of the major advantages of theHealthy No-Bake Oreo Cheesecake Bites – Easy Spring Festival Dessert Recipeis their impressive shelf life and make-ahead potential. You can prepare the mixture, roll the bites, and coat them up to three days in advance. Store them in an airtight container in the refrigerator. Layer them carefully between sheets of parchment paper to prevent the coating from sticking or rubbing off.
For longer storage, these bites freeze beautifully. Place the finished, coated truffles on a baking sheet and freeze them solid for about an hour. Once frozen, transfer them to a freezer-safe bag or container. They will last for up to two months. Simply pull them out of the freezer about 30 minutes before serving to let them thaw slightly. They are often even better when served slightly chilled, providing a refreshing snap that is highly appreciated after a warm holiday meal.
Why Chilling is Non-Negotiable
Do not underestimate the power of chilling. This is a “no-bake” recipe, but it is not a “no-wait” recipe. The minimum two hours of refrigeration is crucial because it allows the fat molecules in the cream cheese and butter to solidify, transforming the mixture from a soft, sticky dough into a firm, manageable consistency. If you skip or shorten this step, you will end up with messy, misshapen blobs that require continuous wiping of your hands, which is far less enjoyable than a quick, clean rolling process.
By following these steps and incorporating some simple decorative touches, you will create a show-stopping dessert that proves elegance does not always require an oven or hours of grueling effort. Enjoy the compliments!
Let’s be honest, holiday prep can feel like a culinary marathon run in ill-fitting shoes. Every year, I vow to create some complex, stunning dessert that looks like it belongs in a museum, only to end up sweating over a bain-marie while everyone else enjoys the festivities. That’s why I became obsessed with finding the perfect cheat dessert. It needed to be impressive, universally adored, and require zero interaction with the oven. Enter the world of chilled, creamy treats.
My kitchen experimentation eventually led to these magnificent creations—a lightened-up version of classic cheesecake mixed with the satisfying crunch of chocolate sandwich cookies. TheseHealthy No-Bake Oreo Cheesecake Bites – Easy Spring Festival Dessert Recipeare the answer to your prayers. They offer maximum flavor with minimal effort, making them an ideal preparation for gatherings when time is a precious commodity. Forget complex baking schedules and sticky cleanup; these are all about smooth, quick assembly and glorious, satisfying texture.
The Quest for the Ultimate Stress-Free Dessert
Why Spring Festivals Demand No-Bake Magic
The transition from winter means lighter flavors and refreshing textures. Heavy, dense baked goods sometimes feel overwhelming after a large family meal. These healthy chilled dessert bites are inherently celebratory, featuring contrasting textures—a sturdy base and a smooth, rich filling—and they hold up beautifully when traveling to a neighbor’s house. Plus, when you use reduced-fat cream cheese and skip the deep sugar rush of traditional recipes, you feel less like you ate a brick of dessert and more like you enjoyed a delightful, small indulgence. They look intricate, but the secret is how ridiculously easy they are to assemble. This recipe ensures you spend more time socializing and less time hovering over a hot oven.
We are making cheesecake accessible and low-maintenance. This is particularly crucial during the Spring Festival preparations, where the kitchen often transforms into a vibrant, chaotic hub of savory cooking. Being able to prepare a spectacular dessert days in advance and simply pull it out of the freezer eliminates a major source of holiday stress. The simplicity of the ingredients list further elevates its appeal, proving that the most delicious treats often require the least fuss. They are portable, shareable, and disappear quickly, which is the hallmark of any successful party dessert.
Ingredients for Creamy Cookie Cheesecake Truffles
This recipe relies on simple ingredients, focusing on quality and freshness. Make sure your cream cheese is completely softened to prevent lumps in your final mixture. For the “Oreo” flavor, use your favorite chocolate sandwich cookie brand, keeping in mind that some brands offer healthier, whole-grain alternatives if you are maximizing the “healthy” aspect of this recipe.
Crust Components
- 1 ½ cups crushed chocolate sandwich cookies (about 18 cookies)
- 4 tablespoons melted unsalted butter or plant-based butter alternative
Filling Components
- 16 ounces reduced-fat cream cheese, softened
- ½ cup powdered sugar (or erythritol for a lower-sugar option)
- 1 teaspoon pure alcohol-free vanilla extract
- ¼ cup heavy cream or full-fat Greek yogurt (for structure and creaminess)
- ¼ cup mini chocolate chips (optional, for folding into the mix)
Topping (Optional)
- ¼ cup crushed cookies
- 2 tablespoons melted dark chocolate for drizzling
Preparing Your Healthy No-Bake Oreo Cheesecake Bites
This process is divided into three satisfying phases: crushing, mixing, and chilling. We are aiming for maximum smoothness in the filling and maximum stability in the crust. You should gather all your ingredients and equipment, including a muffin tin lined with paper liners or silicone cups, before you begin the process. Trust me, organization is the key to no-bake success.
The Cookie Crust Foundation
Start by pulverizing your cookies until they resemble fine, sandy crumbs. A food processor works quickly, but sealing them in a Ziploc bag and attacking them with a rolling pin works just as well (and is incredibly therapeutic). Pour the melted butter over the crumbs and mix until the texture resembles wet sand. Press about one tablespoon of this mixture firmly into the bottom of each prepared muffin liner. Use the bottom of a small glass or measuring cup to compact the crust completely. Pop this crust layer into the freezer while you prepare the filling; this gives it a necessary head start on setting.
The crust must be packed tightly, otherwise, it will crumble when you try to serve the bites. This preliminary freeze is essential for ensuring structural integrity, allowing the butter to solidify and bind the cookie particles together firmly. Spend a solid minute or two on this crucial step before moving on to the creamy component. If you skip this, you might end up with delicious, but sadly deconstructed, dessert piles.
Whipping the Dreamy Filling
In a large bowl, use an electric mixer to beat the softened cream cheese until it is incredibly smooth and light—this might take two to three minutes. Gradually incorporate the powdered sugar, mixing until the mixture is fully combined and there are no gritty remnants. Beat in the alcohol-free vanilla extract and the heavy cream (or Greek yogurt). The mixture should be thick, creamy, and able to hold soft peaks. Gently fold in any mini chocolate chips or extra cookie pieces if you desire a chunkier texture.
Do not over-mix once you add the liquid components, especially if you opted for Greek yogurt. You are looking for a beautiful, velvety consistency that is stable enough to hold its shape when spooned onto the crust. This creamy texture is what elevates the simple ingredients and makes thisHealthy No-Bake Oreo Cheesecake Bites – Easy Spring Festival Dessert Recipefeel so luxurious. Taste test here, too; adjust sweetness if you are using alternative sugar replacements, as they vary greatly in potency.
Assembly and the Waiting Game
Spoon the cheesecake filling equally over the chilled crusts. Smooth the tops with a spatula. If you are using the topping, sprinkle the remaining crushed cookies or drizzle melted chocolate over the tops now. The true magic of this healthy chilled dessert happens in the refrigerator. Chill them for at least four hours, or preferably overnight, until they are perfectly firm and ready to be peeled from their liners and served. Patience is a virtue, especially when it comes to no-bake recipes, as insufficient chilling results in a sloppy, disappointing outcome.
The Accidental Discovery of Sunshine on a Plate

I swear, these bites only exist because I nearly set my kitchen on fire trying to bake a fancy layered cake. Desperate for a quick save before guests arrived, I smashed cookies, mixed them with cream cheese, and froze the mess. The resulting delight was far better than my original smoky plan!
Perfecting the Cooking Process
Since we are dodging the oven, perfection hinges on chilling time. First, blend your crust base and press it firmly into the liners. Next, whip the filling until fluffy. Finally, ensure a minimum of four hours of chilling for structure.
Add Your Touch
Swap out the traditional cream cheese for Greek yogurt for extra tang and protein. Try adding a zest of orange or lemon for a brighter Spring flavor. You can also coat the finished bites in melted dark chocolate or crushed pistachios.
Storing & Reheating
Since reheating isn’t necessary (it’s frozen dessert!), focus on storage. Keep the bites tightly sealed in an airtight container in the freezer for up to one month. Transfer them to the refrigerator 30 minutes before serving for the perfect texture.
Chef’s Essential Tips for the Perfect Bite
- Always start with fully softened cream cheese, letting it sit on the counter for at least an hour to avoid any unwanted lumps in your filling mixture.
- For an ultra-clean presentation, use silicone muffin liners; they peel away easily without leaving ragged edges on the crust or filling.
- If you need the bites quickly, flash-freeze them for 90 minutes instead of refrigerating, but be aware that the texture will be slightly icier.
My niece, who usually prefers candy over everything, devoured three of these bites immediately after I served them, claiming they tasted like happiness and celebration rolled into one perfect mouthful.
Conclusion for Healthy No-Bake Oreo Cheesecake Bites – Easy Spring Festival Dessert Recipe
TheseHealthy No-Bake Oreo Cheesecake Bites – Easy Spring Festival Dessert Recipeoffer the ultimate combination of flavor, convenience, and charm. We achieved that decadent cheesecake flavor without turning on the oven or spending hours on complex assembly. They are robust enough for transport and elegant enough for any holiday table. Remember that great dessert isn’t always about complexity; sometimes, it’s about smart shortcuts and creamy, cookie-filled joy. Go ahead, make a batch (or three!) and enjoy a truly stress-free holiday celebration. Your friends and family will thank you for this delicious, lighter dessert alternative.


Leave a Comment