

I once spent three hours meticulously baking a complicated layer cake, only for it to slide dramatically into the trash bin moments before serving. Never again! Now I rely entirely on the effortless, blush-pink elegance of these stunningPink Oreo Truffle Balls – Easy No-Bake Dessert Bites.
These creamy, delightful spheres prove that the most spectacular desserts often require zero oven time and minimal effort, ensuring your kitchen stays clean and your sanity remains intact for the party.
- These delightful bites require zero baking time and only three main ingredients, making them the ultimate secret weapon for quick party preparation.
- The intense contrast of rich, dark chocolate cookie crunch against the sweet, tangy cream cheese filling makes them absolutely irresistible.
- Their vibrant pink hue and smooth candy coating instantly elevate them from a simple treat to a stunning, photo-ready centerpiece for any event.
- You can easily customize these simple truffles for any holiday or occasion by changing the color of the dipping chocolate or decorative sprinkles used.
Ingredients for Pink Oreo Truffle Balls – Easy No-Bake Dessert Bites
Here’s what you’ll need to make this delicious dish:
- Oreo Cookies (Standard Size)Use the classic variety; the chocolate cookie and white cream interior provide the perfect texture base for the truffles.
- Cream Cheese (Full Fat, Softened)Ensure the cream cheese is fully softened to room temperature for smooth blending, otherwise, your mixture will be lumpy and hard to roll.
- White Chocolate or Candy MeltsWhite chocolate forms the perfect, stable canvas for adding pink coloring and provides a smooth, crisp shell when chilled.
- Pink Food Coloring (Gel Preferred)Gel coloring works best as it is highly pigmented and won’t add excess liquid to the melting chocolate, preventing it from seizing.
- Sprinkles (Optional)Use edible glitter, sanding sugar, or small nonpareils to add a professional finishing touch and extra crunch to the exterior.
The full ingredients list, including measurements, is provided in the recipe card directly below.
How to Make Pink Oreo Truffle Balls – Easy No-Bake Dessert Bites
Follow these simple steps to prepare this delicious dish:
-
Step 1: Crush the Cookies to Dust
Place the entire package of Oreo cookies, filling and all, into a food processor. Pulse them until they are finely crushed into a fine, uniform dust that resembles wet sand, ensuring no large chunks remain.
-
Step 2: Mix and Combine the Truffle Base
Transfer the cookie crumbs into a large mixing bowl. Add the softened cream cheese and mix thoroughly, either using a strong spatula or a hand mixer on low speed, until the mixture is uniform and holds together easily. It should feel like thick cookie dough.
-
Step 3: Roll and Chill the Truffles
Using a small cookie scoop or a tablespoon, portion out the mixture. Roll each portion tightly between your palms to form smooth, uniform balls approximately one inch in diameter. Place these balls on a parchment-lined baking sheet and refrigerate them for at least 30 minutes, or until they are firm enough to dip easily.
-
Step 4: Prepare the Pink Chocolate Coating
Melt the white chocolate or candy melts in a double boiler or carefully in the microwave, stirring every 30 seconds until fully smooth. Once melted, stir in a small amount of pink gel food coloring until you achieve a beautiful, vibrant pink hue. Ensure the color is fully incorporated.
-
Step 5: Dip and Decorate the Pink Oreo Truffle Balls
Working quickly, use a dipping tool or fork to submerge each chilled truffle ball completely into the melted pink chocolate. Tap off any excess chocolate before gently returning the truffle to the parchment-lined sheet. Immediately top with your chosen sprinkles or decorative elements while the chocolate is still wet.
-
Step 6: Set and Serve
Return the decorated truffles to the refrigerator for another 15 to 20 minutes until the chocolate shell is completely set and crisp. Transfer to plates and serve cold for the perfect finishing touch to any gathering.
The Culinary Psychology of the No-Bake Dessert
There is a certain joy in creating something stunning without ever turning on the oven. We often associate complex, beautiful desserts with hours of work, high heat, and potential disaster—the dreaded sunken cake or the burnt edges of a forgotten pie. No-bake treats, particularly rich and dense options like these creamy cookie truffles, offer instant gratification and a high return on minimal effort. This process is less stressful and significantly more forgiving, which is likely why these delightful, effortless desserts always make an appearance at successful parties.
Why We Love No-Bake Truffles So Much
The appeal of truffles lies not just in their speed of assembly, but also in their phenomenal texture. That soft, dense, intensely flavored interior contrasts perfectly with the crisp, snappy exterior provided by the chocolate coating. Furthermore, truffles are portion-controlled perfection. You don’t need plates or forks; they are designed for graceful, two-bite consumption, making them the ideal handheld treat for mingling guests. The minimal cleanup required afterward is simply the cherry on top, allowing you more time to enjoy your beautifully curated event instead of scrubbing baking sheets.
Expert Tips for Flawless Pink Oreo Truffle Balls
While this recipe is incredibly straightforward, a few professional tricks can elevate your truffles from good to absolutely glorious. Following these suggestions ensures consistency and a professional finish every time you make these delightful dessert spheres.
Getting that Perfect Pink Coating
The biggest challenge when coating truffles is often achieving a smooth, tempered look without the chocolate seizing. Never use liquid food coloring in your melted chocolate; the water content will instantly cause the cocoa solids to clump into an unusable, grainy mess. Always use gel or powder food coloring specifically designed for chocolate work. Additionally, if your melted chocolate seems too thick for easy dipping, stir in a teaspoon of neutral oil (like coconut or vegetable oil) to thin it slightly, creating a smoother, more manageable consistency for coating the chilled balls.
Troubleshooting the Truffle Mix
If your cookie and cream cheese mixture is too sticky after combining, you likely need a little more time in the freezer, or your cream cheese might have been slightly warmer than ideal. If the mixture is too wet to roll easily, place the bowl in the freezer for 10 minutes. If, however, the mixture is too crumbly and won’t bind, add cream cheese one teaspoon at a time, mixing fully, until you reach that perfect playdough-like consistency. The ideal texture should hold its shape firmly when rolled but shouldn’t stick excessively to your hands.
Fun Variations and Flavor Twists
While the classicPink Oreo Truffle Balls – Easy No-Bake Dessert Bitesare fantastic, these recipes are highly adaptable to seasonal flavors or personal preferences. Feel free to use the base formula—1 part cream cheese to 3 parts crushed cookies—and experiment with different components.
- Lemon Zest Brightness:Stir in a tablespoon of fresh lemon zest and a few drops of lemon extract into the cream cheese mixture for a tart, refreshing flavor contrast. Coat these in a bright yellow candy melt instead of pink.
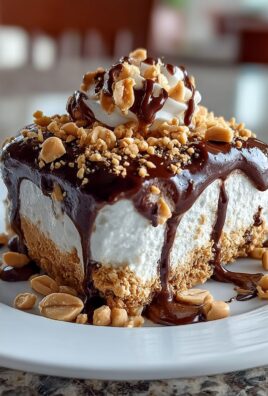
- Peanut Butter Swirl:Substitute half of the cream cheese with smooth peanut butter for a dense, nutty interior. Dip these in milk chocolate and drizzle with white chocolate for a contrasting look.
- Mint Chocolate Chip:Use mint-flavored sandwich cookies instead of the classic Oreos. Add a drop of mint extract to the cream cheese, and coat them in dark chocolate for a rich, cooling dessert perfect for holidays.
- Coffee Infusion:Mix a teaspoon of finely ground espresso powder into the cookie crumbs before adding the cream cheese. This deepens the chocolate flavor and gives the treat a subtle, sophisticated coffee note.
Storage and Make-Ahead Magic
These truffles are perfect for preparing ahead of time, which is essential if you are planning a large event or simply want an emergency stash of dessert ready in the freezer. Store the uncoated truffle balls in an airtight container in the refrigerator for up to one week. Once coated and decorated, they maintain their quality and flavor excellently.
If you need to make them even further in advance, you can freeze the finished, coated truffles. Arrange them in a single layer in an airtight container, separated by parchment paper, and they will keep well for up to one month. Thaw them overnight in the refrigerator before serving to prevent condensation from forming on the smooth chocolate shell.
Frequently Asked Questions
Can I use reduced-fat cream cheese for this recipe?
While you technically can, full-fat cream cheese provides the necessary richness and structural integrity that helps the truffles bind together without becoming sticky or weeping liquid as they sit. We highly recommend sticking to the full-fat variety for the best results.
How do I keep the chocolate from cracking when the truffles chill?
Chocolate cracks when the temperature difference between the melted coating and the cold truffle ball is too extreme. Ensure your truffles are merely cold (chilled in the fridge) rather than frozen solid before dipping. Also, avoid dipping extremely thick coats of chocolate, as thick layers are more prone to cracking as they contract.
What is the difference between candy melts and white chocolate?
Candy melts, often called confectionery coating, are typically made with vegetable fats instead of cocoa butter, making them easier to melt and color without needing tempering. White chocolate contains cocoa butter and often produces a richer flavor, but it may seize easily if you use gel coloring or if it gets too hot.
How long do these truffle balls need to set fully?
Typically, 15 to 20 minutes in the refrigerator is sufficient for the chocolate shell to set and become firm. If your kitchen is very warm, you may need closer to 30 minutes, or you can speed up the process by placing them in the freezer for about 10 minutes.
The Day My Mixer Tried to Stage a Coup
I distinctly remember the day I decided baking was too much work. It involved flour raining down like snow, a smoke alarm singing opera, and a cake that looked suspiciously like a collapsed bridge. That’s when I realized the true genius of the no-bake dessert. We are here today to celebrate simplicity, elegance, and the joy of creating something truly stunning without turning on an oven. Enter the world of luxurious, bite-sized delights that require zero proofing, zero rising, and zero fire extinguishers.
If you need a quick fix for a party, a beautiful treat for a weekend gathering, or just an emergency supply of pure happiness, these simple truffle bites are your calling. They are creamy, decadent, and ridiculously easy to make. Best of all, they sport a fantastic rosy hue, making them perfect for celebrations, holidays, or just brightening up a Tuesday afternoon. We are diving into making fantasticPink Oreo Truffle Balls – Easy No-Bake Dessert Bitesthat will impress everyone.
Why Everyone Needs a No-Bake Superstar Recipe
The beauty of a no-bake recipe is the liberation it offers. You bypass all the potential pitfalls of yeast, oven temperature fluctuations, and that terrifying moment when you open the oven door to discover a baking tragedy. These luscious balls rely on the glorious combination of crushed chocolate sandwich cookies and cream cheese, creating a dense, fudgy interior that screams indulgence. The coating provides a beautiful, snappy finish, ensuring these treats look as professional as they taste.
Furthermore, these treats are incredibly versatile. You can make them ahead of time, which is the secret weapon of any stress-free host. Just whip up the mixture, chill, roll, coat, and store them until you are ready for guests to fawn over them. If you love effortless entertaining and dreamy desserts, then mastering this recipe for delicious truffle bites is non-negotiable. These simple pink bites offer maximum delight with minimal fuss.
Gathering the Essentials for Dessert Nirvana
You don’t need a vast collection of exotic ingredients or specialized equipment for this recipe. If you have a food processor (or serious determination and a rolling pin) and a bowl, you are ready to go. Quality matters here, so choose your ingredients wisely, although the beauty of this recipe is that even standard pantry staples shine brightly. Getting the correct consistency on your chocolate coating is the most important part of this entire process.
Ingredients List
- 1 (14.3 oz) package of chocolate sandwich cookies (original or pink/red velvet flavored for an extra boost of color)
- 8 ounces (one block) of full-fat cream cheese, softened to room temperature
- 1 teaspoon vanilla bean paste
- 1/4 teaspoon fine salt (optional, but it balances the sweetness beautifully)
- 12 ounces of white melting chocolate or white chocolate chips
- Pink or red food coloring (gel colors work best for vibrant results)
- Optional Garnishes: Sprinkles, crushed freeze-dried raspberries, or extra crushed sandwich cookies
We use gel food coloring because it provides intense pigment without adding excess liquid, which could compromise the texture of your melted chocolate coating. Remember, the key to successful truffle making is control over moisture, so stay away from watery coloring agents. Ensure all ingredients are measured correctly before you begin the mixing process.
The Step-by-Step Guide to Perfect Pink Oreo Truffle Balls
This process is so straightforward, you can practically do it blindfolded—though I strongly recommend keeping your eyes open when dealing with melted chocolate. We break this down into three simple phases: the crush, the chill, and the coat. Follow these instructions carefully to ensure your final product is Instagram-worthy and perfectly delicious.
Phase 1: The Crush and The Mix
First, take the entire package of chocolate sandwich cookies. Yes, the filling stays in. Place them into a food processor and pulse until they become fine crumbs, resembling damp sand. If you are using a rolling pin and a bag, crush them until the texture is consistently fine. You should end up with approximately 1 ½ to 1 ¾ cups of crumbs.
Next, transfer the crumbs to a mixing bowl. Add the softened cream cheese, vanilla bean paste, and salt (if using). Using a sturdy spatula or an electric mixer on low speed, mix these ingredients until thoroughly combined. This mixture should be firm, sticky, and uniform in color. If it seems too sticky to handle, chill it for 15 minutes before proceeding to the rolling stage. A cohesive dough prevents later issues.
Phase 2: Rolling and Freezing for Structure
Scoop the mixture using a small cookie scoop or a measuring spoon (about 1 tablespoon per ball). Roll the mixture firmly between your palms to create smooth, dense spheres. Place these truffle balls onto a baking sheet lined with parchment paper or a silicone mat. This parchment is vital to prevent sticking later.
Once all the truffle balls are rolled, place the tray into the freezer. Freeze for at least 30 minutes. This step is crucial. Freezing ensures the truffles hold their shape perfectly when they hit the warm chocolate coating, preventing them from softening or falling apart. Cold truffle centers equal smooth, flawless coating results. Do not skip this chilling step if you want beautiful, crack-free coating on your sweet bites.
Dipping and Decorating These No-Bake Dessert Bites
The final stage is where the magic happens and where our pink hue comes into play. Patience and proper temperature control are the secrets to a professional-looking truffle coating. If you rush the dipping process, you may end up with cracks or thick, uneven coating layers. Work efficiently but deliberately during this stage.
Phase 3: The Vibrant Pink Coating
Melt the white chocolate. You can do this using a double boiler (a bowl set over simmering water) or in the microwave in 30-second intervals, stirring thoroughly between each interval. Do not overheat the chocolate, as this causes it to seize and become grainy. Once smooth, remove it from the heat source.
Add a small amount of pink or red gel food coloring to the melted white chocolate, stirring gently until you achieve your desired shade of rosy perfection. Start small; a little gel color goes a very long way. Once the color is perfect, grab your frozen truffle balls.
Using a fork or a dipping tool, submerge one frozen truffle ball into the melted pink chocolate. Tap the fork gently against the edge of the bowl to remove excess chocolate. Slide the coated truffle back onto the parchment-lined tray. While the chocolate is still wet, add any desired sprinkles or garnishes.
Repeat this process quickly until all the truffle balls are coated. If the chocolate in the bowl starts to thicken, return it briefly to the heat source to loosen it up again. Allow the truffles to set completely at room temperature or chill them quickly in the refrigerator for about 15 minutes until the coating is firm and glossy.
ThesePink Oreo Truffle Balls – Easy No-Bake Dessert Bitesare now ready to be served and adored!
Frequently Asked Questions About Truffle Making
We cover the common queries that often pop up when making these delightful, simple treats. Mastering the basics ensures success every time you prepare a batch of these glorious dessert spheres.
Absolutely! You can prepare the cookie and cream cheese mixture and store it in an airtight container in the refrigerator for up to three days before rolling and coating. This makes your prep work highly efficient for parties.
Chocolate seizes when even a tiny bit of water or steam gets into it, or when it overheats. If it happens, try stirring in a teaspoon of neutral oil (like vegetable oil) or melted butter, stirring vigorously. If it’s too far gone, unfortunately, you may need to start with a fresh batch of chocolate for the coating.
Ensure your cream cheese is completely soft and at room temperature before mixing. If your mixture feels crumbly, roll the balls very firmly between your palms; the warmth of your hands will help compact the ingredients and create a smoother surface before freezing.
Yes, you can! Using dark chocolate will result in a luxurious, deep coating, though you won’t achieve the vibrant pink aesthetic. If you skip the food coloring and use dark chocolate, you will have wonderfully rich chocolate truffle bites instead.
I learned the hard way that trying to rush the freezing process leads to uneven coating. Once, I had a tray of “wobbly” truffles that refused to hold their perfect sphere shape, but they were still devoured within minutes!
- Make sure the cream cheese is fully softened; this ensures a perfectly smooth truffle dough that rolls easily without cracking or crumbling.
- Always freeze the rolled truffles for a minimum of 30 minutes before dipping to ensure they remain intact when meeting the warm chocolate coating.
- Use oil-based or gel food coloring, never liquid coloring, when tinting the white chocolate to prevent the coating from seizing or hardening prematurely.
Perfecting the Cooking Process

For maximum efficiency, crush the cookies and mix the truffle base first. Then, while the rolled truffle balls are chilling in the freezer, use that time to melt and prepare the pink white chocolate coating for dipping, ensuring your workstation is ready for the coating stage. This sequential process maximizes speed and ensures the truffles remain icy cold.
Add Your Touch
Try swapping half of the crushed cookies with ground almonds for a slightly nutty texture and flavor complexity. Alternatively, incorporate a half teaspoon of imitation mint extract into the cream cheese mixture for a refreshing twist, or finish them with a dusting of cocoa powder instead of sprinkles.
Storing & Reheating
Store these no-bake dessert bites in an airtight container in the refrigerator for up to two weeks, or freeze them for up to two months. Serve them chilled directly from the fridge, as they maintain the best firm texture and flavor when cold; reheating is unnecessary as they are served cold.
The Emergency Dessert Solution You Never Knew You Needed
We’ve all been there: that moment when the clock is ticking, the guests are arriving in T-minus 45 minutes, and the only dessert option in the house is a half-eaten bag of slightly stale pretzels. Panic sets in, followed swiftly by the realization that turning on the oven is a commitment you simply cannot make right now. Fear not, my friend. I have stumbled upon the secret weapon of stress-free entertaining—a recipe so gloriously simple, so outrageously delicious, it feels like cheating. This is the tale of how these incredible Pink Oreo Truffle Balls – Easy No-Bake Dessert Bites saved my reputation and possibly my sanity.
Why Pink? Because Dessert Needs a Pop Star Moment
Sure, classic chocolate sandwich cookie truffles are fantastic. But sometimes, life needs a little pizzazz, a little pop of color that screams “I tried… but not really.” The secret to achieving this stunning pink hue is surprisingly simple. These tiny, decadent spheres require three main components, minimal cleanup, and zero baking prowess. If you can use a food processor and melt chocolate, congratulations, you just earned your dessert degree. We aim for maximum impact with minimum kitchen drama, guaranteeing you a standing ovation every time these showstoppers hit the table.
Gathering Your Arsenal: Ingredients List
This recipe prides itself on simplicity. You need high-quality ingredients, but the list remains delightfully short. Make sure your cream cheese is completely softened; this is the absolute key to achieving that perfectly smooth, bindable dough. Cold cream cheese results in lumpy, frustrating mixtures, and nobody has time for that kitchen drama when company is about to ring the doorbell. Achieving the right consistency right from the start makes the rolling process much quicker.
- 1 (15.25 oz) package of Strawberry Cream Sandwich Cookies (or regular sandwich cookies plus a few drops of red food coloring)
- 8 oz block of cream cheese, softened
- 12 oz package of white melting chocolate (wafers or candy bark work best)
- 1 teaspoon vanilla flavoring
- Optional: Pink or red sprinkles, or reserved cookie crumbs, for decoration
The Gear: Tools You’ll Need
While this recipe requires no baking, a few key tools make the process seamless. A powerful food processor is non-negotiable for quickly transforming the cookies into fine crumbs. Trust me, crushing them by hand takes forever and rarely achieves the necessary powder consistency. Having parchment paper ready is also crucial, as it prevents the truffles from sticking while they chill and while the chocolate coating sets.
- Food Processor (essential for grinding the cookies)
- Mixing Bowl
- Cookie Scoop or small spoon
- Baking sheets lined with parchment paper
- Microwave-safe bowl for melting chocolate
Making the Mix: The Truffle Base
This is where the magic happens, and it happens fast. First, dump the entire package of sandwich cookies into your food processor. Pulse the cookies until they resemble fine crumbs. You don’t want large chunks; you want powder ready to absorb the cream cheese. Next, add the softened cream cheese and vanilla flavoring right into the processor. Process until the mixture pulls away from the sides and forms a large, cohesive ball of dough. If the weather is warm and the dough seems too sticky to handle, chill it for 10 minutes. This quick chill time firms it up just enough for easy rolling.
Rolling and Chilling Your Pink Dessert Balls
Use a small cookie scoop or roll about one tablespoon of the mixture into tight, uniform spheres. Place these lovely pink dessert balls onto the prepared baking sheet. Rolling them neatly ensures a professional look after dipping, creating perfect spheres ready for their chocolate bath. Once all your truffles are rolled, they must chill. This step is non-negotiable! Place the tray in the refrigerator for at least 30 minutes. Chilling prevents the truffles from disintegrating when they meet the warm melted chocolate and helps the coating adhere properly without sliding off.
Dipping and Decorating These No-Bake Treats
Melt the white chocolate gently according to package directions, stirring frequently. Melting slowly prevents scorching, which results in grainy, unusable chocolate. Dip each chilled truffle into the melted chocolate using a fork or dedicated dipping tool. Tap the fork gently against the side of the bowl to remove excess coating. Immediately place the dipped truffle back on the parchment paper and sprinkle with decorations while the coating is still wet. Allow the coating to set fully before serving. For a quicker set, you can pop the tray back into the refrigerator for 15 minutes. These gorgeous no-bake dessert bites keep well and look stunning arranged on a platter.
Conclusion for Pink Oreo Truffle Balls – Easy No-Bake Dessert Bites
We successfully conquered the urgent dessert crisis without resorting to stress baking or complicated techniques. These Pink Oreo Truffle Balls – Easy No-Bake Dessert Bites deliver maximum flavor and visual appeal with truly minimal effort. This recipe proves that sophistication doesn’t require an oven or hours of exhaustive kitchen time. Whether you need a quick party favor, a beautiful dessert for a celebratory gathering, or just a truly irresistible snack for your own enjoyment, these simple truffle spheres are your perfect match. Go forth and amaze your friends with your sudden culinary prowess—just remember not to tell them how absurdly easy it was to create these decadent treats!
FAQs
How long do Pink Oreo Truffle Balls – Easy No-Bake Dessert Bites last in the refrigerator?
These delightful truffle bites maintain their optimal freshness and texture when stored in an airtight container in the refrigerator. Typically, they remain delicious for up to seven days, though they seldom last that long once people discover them! For extended storage, you can freeze them before the chocolate coating is applied. Once coated, transfer them to the freezer and they will keep well for about one month. Always thaw frozen truffles overnight in the fridge before serving, ensuring they are protected from humidity which can cause the chocolate coating to sweat or become sticky.
Can I use regular sandwich cookies instead of strawberry cream ones for this recipe?
Absolutely! If you cannot find the strawberry variety or simply prefer the classic flavor, standard chocolate sandwich cookies work perfectly. Since using the original cookies will result in brown truffles, you will need to incorporate food coloring to achieve that signature pink color. Mix a few drops of red or bright pink gel food coloring directly into the softened cream cheese mixture before processing it with the cookie crumbs. This simple adjustment ensures your easy no-bake dessert bites still have that beautiful, vibrant pop of color that makes them so unique and appealing.
What is the best way to prevent the chocolate coating from cracking when dipping the truffles?
Cracking usually happens due to a significant temperature difference between the truffle ball and the warm chocolate coating. Ensure your truffles are adequately chilled—at least 30 minutes in the refrigerator—but avoid freezing them completely, as that sudden change is too drastic. Also, make sure your melted white chocolate is not too hot; overheating it can cause it to seize or crack the cold truffles. Melt it slowly over low heat or in short microwave bursts. Using high-quality melting wafers designed specifically for dipping significantly reduces the likelihood of cracks and ensures a smooth, shiny finish.
What are some alternative decorations for these easy no-bake dessert bites?
While pink sprinkles are festive and popular, feel free to get creative with your decorations for added flair. For a sophisticated look, dust them with edible shimmer powder or drizzle them with contrasting chocolate, like dark or milk chocolate, after the white coating sets. You could also crush a few extra strawberry cream sandwich cookies and dust the coating with the crumbs for added texture and intense cookie flavor contrast. Tiny dehydrated strawberry pieces or finely chopped pistachios also provide beautiful, flavorful garnishes for these sweet and simple treats, enhancing their overall presentation.


Leave a Comment