

Puff Pastry Cheese Danish is a delightful treat that has captured the hearts of pastry lovers around the world. With its flaky, buttery layers and a rich, creamy cheese filling, this pastry is perfect for breakfast, brunch, or even as a sweet snack. The origins of the Cheese Danish can be traced back to Denmark, where bakers have perfected the art of pastry-making for centuries. This beloved pastry has since made its way into cafes and homes globally, becoming a staple in many cultures.
People adore Puff Pastry Cheese Danish not only for its irresistible taste but also for its delightful texture. The contrast between the crisp outer layer and the smooth, sweet cheese filling creates a symphony of flavors that is hard to resist. Plus, the convenience of using store-bought puff pastry makes this recipe accessible for both novice and experienced bakers alike. Whether you’re hosting a gathering or simply indulging in a quiet moment with your coffee, this pastry is sure to impress and satisfy your cravings.

Ingredients:
- 1 package (17.3 oz) frozen puff pastry sheets, thawed
- 8 oz cream cheese, softened
- 1/2 cup granulated sugar
- 1 large egg
- 1 teaspoon vanilla extract
- 1/4 teaspoon almond extract (optional)
- 1 egg (for egg wash)
- 1 tablespoon milk (for egg wash)
- Powdered sugar (for dusting)
- Fresh fruit or jam (optional, for topping)
Preparing the Cream Cheese Filling
- In a medium mixing bowl, combine the softened cream cheese and granulated sugar. Using a hand mixer or a whisk, beat the mixture until it is smooth and creamy, ensuring there are no lumps.
- Add in the large egg, vanilla extract, and almond extract (if using). Continue to mix until all ingredients are well incorporated and the filling is light and fluffy. Set aside.
Preparing the Puff Pastry
- Preheat your oven to 400°F (200°C). Line a baking sheet with parchment paper to prevent sticking.
- On a lightly floured surface, unfold the thawed puff pastry sheets. Roll each sheet out gently with a rolling pin to smooth out any creases and to slightly increase the size.
- Using a sharp knife or a pizza cutter, cut each sheet into squares, approximately 4×4 inches. You should get about 9 squares from each sheet.
- Take each square and make a smaller square inside it by cutting a border about 1 inch from the edges. Be careful not to cut all the way through; you want to create a frame.
Assembling the Cheese Danish
- Preheat your oven to 400°F (200°C) if you haven’t already done so.
- Using a fork, gently prick the inner square of each puff pastry square to prevent it from puffing up too much during baking.
- Place a generous tablespoon of the cream cheese filling in the center of each pastry square, within the borders you created.
- Fold the corners of the outer square towards the center, overlapping slightly, to create a beautiful shape. You can pinch the corners together to secure them if desired.
- In a small bowl, whisk together the egg and milk to create an egg wash. Brush the egg wash over the edges of the pastry to give it a golden color when baked.
Baking the Cheese Danish
- Carefully transfer the assembled cheese danishes to the prepared baking sheet, leaving some space between each one to allow for puffing.
- Bake in the preheated oven for 15-20 minutes, or until the pastries are golden brown and puffed up beautifully.
- Once baked, remove the danishes from the oven and let them cool on the baking sheet for a few minutes before transferring them to a wire rack to cool completely.
Finishing Touches
- Once the danishes are completely cooled, you can dust them with powdered sugar for a sweet finish.
- If you like, top each danish with fresh fruit or a dollop of your favorite jam for added flavor and decoration.
- Serve the puff pastry cheese danishes warm or at room temperature. They make a delightful breakfast treat or a sweet snack any time of the day!
Storage Tips
- If you have any leftovers, store them in an airtight container at room temperature for up to 2 days. For longer storage, you can refrigerate them for up to a week.
- To reheat, simply place them in a preheated oven at 350°F (175°C) for about 5-10 minutes until warmed through and crispy again.
Variations
- For a fruity twist, consider adding a layer of fruit preserves or fresh fruit on top of the cream cheese filling before folding the pastry.
- Experiment with different extracts, such as lemon
Conclusion:
If you’re looking for a delightful treat that combines flaky, buttery pastry with a rich, creamy filling, then this Puff Pastry Cheese Danish is an absolute must-try! The layers of puff pastry create a light and airy texture that perfectly complements the sweet and tangy cream cheese filling. Whether you’re serving it for breakfast, brunch, or as a delightful dessert, this recipe is sure to impress your family and friends.
One of the best things about this Puff Pastry Cheese Danish is its versatility. You can easily customize the filling to suit your taste. For a fruity twist, consider adding fresh berries or a dollop of fruit preserves on top of the cream cheese mixture before baking. If you’re a fan of chocolate, a sprinkle of mini chocolate chips can elevate the flavor profile to a whole new level. You can also experiment with different spices, such as cinnamon or nutmeg, to add warmth and depth to the filling. The possibilities are endless!
When it comes to serving suggestions, I recommend pairing your freshly baked Puff Pastry Cheese Danish with a hot cup of coffee or tea. The combination of the warm pastry and a comforting beverage makes for a perfect morning or afternoon treat. You can also serve it alongside a fresh fruit salad for a refreshing contrast. If you’re hosting a gathering, consider making a variety of these danishes with different fillings to create a beautiful and delicious spread that will have your guests raving.
I encourage you to give this Puff Pastry Cheese Danish recipe a try! It’s simple enough for a beginner yet impressive enough for seasoned bakers. Once you take that first bite, you’ll understand why this recipe is a favorite in many households. Don’t forget to share your experience with me! I would love to hear how your danishes turned out and any creative variations you tried. You can share your photos and stories on social media or in the comments section below. Happy baking!
Puff Pastry Cheese Danish: A Deliciously Easy Recipe
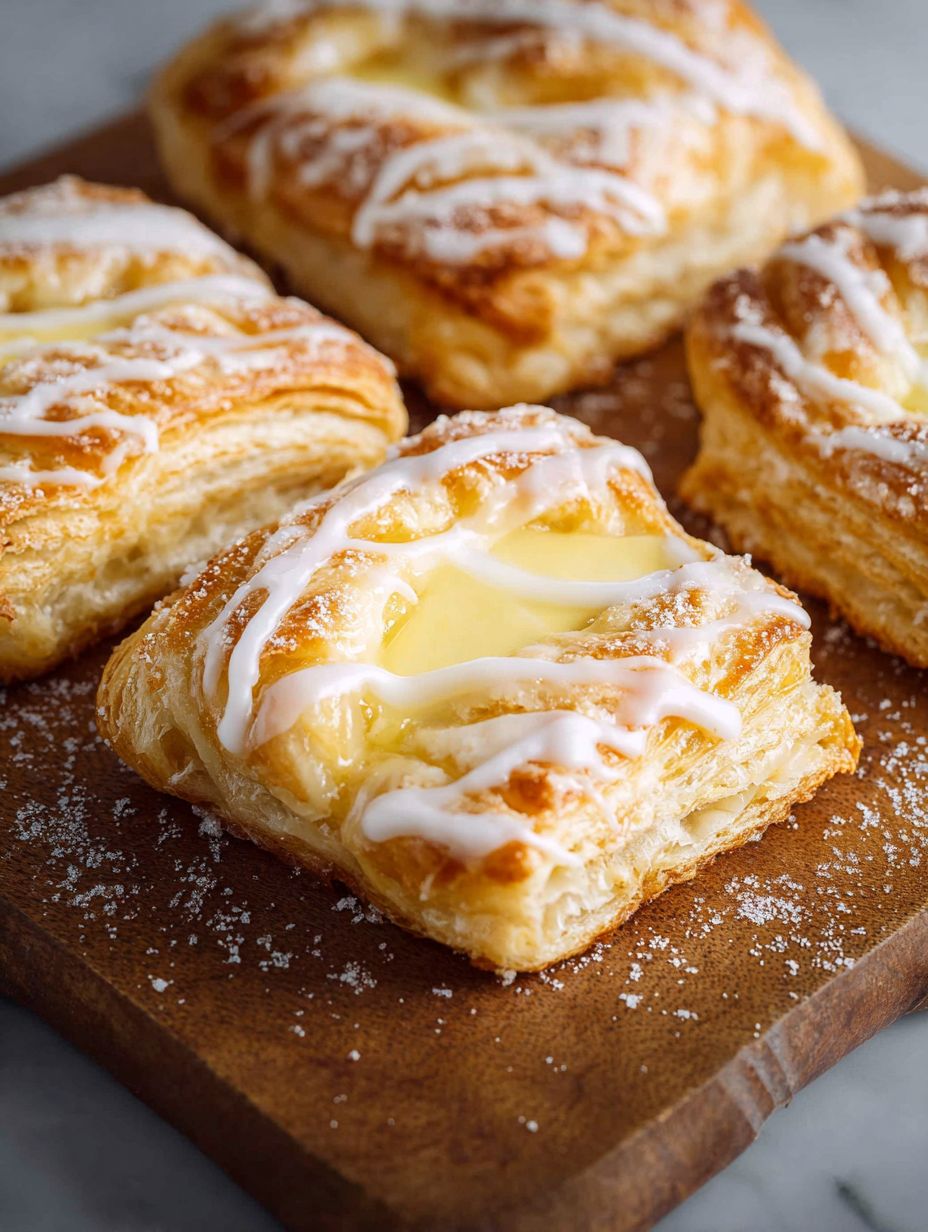
Enjoy these Cream Cheese Puff Pastry Danishes, featuring a creamy filling wrapped in flaky pastry. Perfect for breakfast or a sweet snack, they are easy to make and sure to impress your guests!
Ingredients
- 1 package (17.3 oz) frozen puff pastry sheets, thawed
- 8 oz cream cheese, softened
- 1/2 cup granulated sugar
- 1 large egg
- 1 teaspoon vanilla extract
- 1/4 teaspoon almond extract (optional)
- 1 egg (for egg wash)
- 1 tablespoon milk (for egg wash)
- Powdered sugar (for dusting)
- Fresh fruit or jam (optional, for topping)
Instructions
- In a medium mixing bowl, combine the softened cream cheese and granulated sugar. Using a hand mixer or a whisk, beat the mixture until it is smooth and creamy, ensuring there are no lumps.
- Add in the large egg, vanilla extract, and almond extract (if using). Continue to mix until all ingredients are well incorporated and the filling is light and fluffy. Set aside.
- Preheat your oven to 400°F (200°C). Line a baking sheet with parchment paper to prevent sticking.
- On a lightly floured surface, unfold the thawed puff pastry sheets. Roll each sheet out gently with a rolling pin to smooth out any creases and to slightly increase the size.
- Using a sharp knife or a pizza cutter, cut each sheet into squares, approximately 4×4 inches. You should get about 9 squares from each sheet.
- Take each square and make a smaller square inside it by cutting a border about 1 inch from the edges. Be careful not to cut all the way through; you want to create a frame.
- Using a fork, gently prick the inner square of each puff pastry square to prevent it from puffing up too much during baking.
- Place a generous tablespoon of the cream cheese filling in the center of each pastry square, within the borders you created.
- Fold the corners of the outer square towards the center, overlapping slightly, to create a beautiful shape. You can pinch the corners together to secure them if desired.
- In a small bowl, whisk together the egg and milk to create an egg wash. Brush the egg wash over the edges of the pastry to give it a golden color when baked.
- Carefully transfer the assembled cheese danishes to the prepared baking sheet, leaving some space between each one to allow for puffing.
- Bake in the preheated oven for 15-20 minutes, or until the pastries are golden brown and puffed up beautifully.
- Once baked, remove the danishes from the oven and let them cool on the baking sheet for a few minutes before transferring them to a wire rack to cool completely.
- Once the danishes are completely cooled, you can dust them with powdered sugar for a sweet finish.
- If you like, top each danish with fresh fruit or a dollop of your favorite jam for added flavor and decoration.
- Serve the puff pastry cheese danishes warm or at room temperature. They make a delightful breakfast treat or a sweet snack any time of the day!
Notes
- If you have any leftovers, store them in an airtight container at room temperature for up to 2 days. For longer storage, you can refrigerate them for up to a week.
- To reheat, simply place them in a preheated oven at 350°F (175°C) for about 5-10 minutes until warmed through and crispy again.


Leave a Comment